|
UI Accessibility Plugin
Version 1.1.1
Make your UI accessible for visually impaired users
|
|
UI Accessibility Plugin
Version 1.1.1
Make your UI accessible for visually impaired users
|
Here's how to get your menus converted quickly - without unnecessary explanations or fine-tuning.
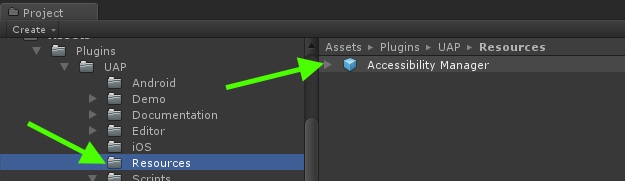
Add the Accessibility Manager prefab to the first scene of your project.
You can play around with the Settings later. For most applications, the default settings will be fine.
|
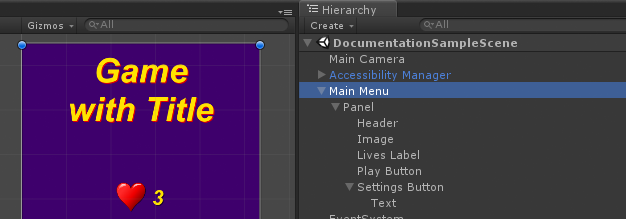
Drag one of your menu screens into the scene.
Every UI element that needs to be accessible to the user will get an additional component attached to it in the next step. To read in more detail about these components and what they do, head over to Plugin Basics.
|
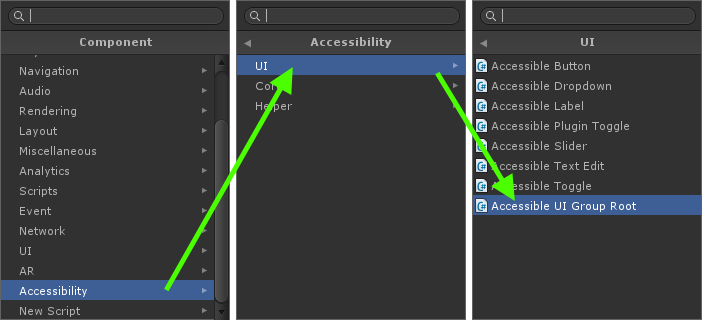
Add an Accessible UI Group Root component to the root of your menu screen
Hint: The Root is usually a Canvas or a Panel, or simply the root of your prefab.
|
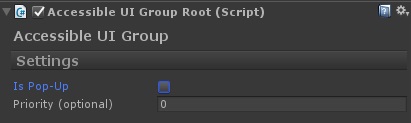
If your prefab/screen/dialog is a popup, you need to check the Popup check box.
|
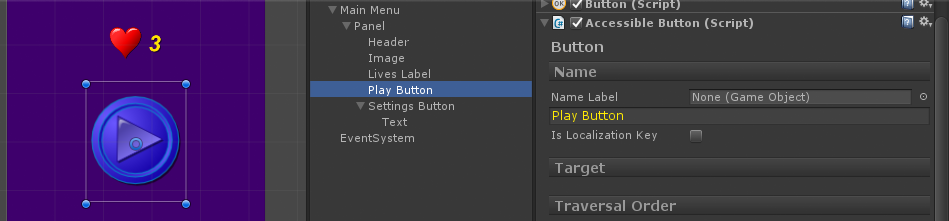
Select a GameObject in your menu screen hierarchy that has a UI element on it that needs to be accessible.
These are Labels, Buttons, Toggles, DropDown Lists, Sliders, Images and Input Edit Fields
Add the appropriate accessibility component to the GameObject
Example: Add the Accessible Button component to the GameObject containing the uGUI Button component (or UIButton in case of NGUI)
|
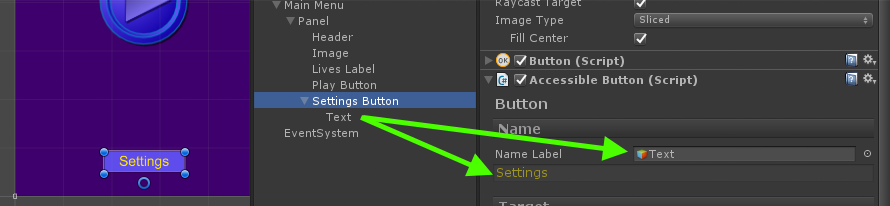
You do not need to add label components to the labels of buttons (or toggles). The Accessible Button component will find the label automatically if it is a child of the button and reference it internally.
|
Hints: Use accessible labels to add text to images
Write custom text into the 'Name' field of the accessibility component if the automatic text isn't appropriate.
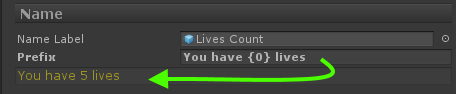
You can also construct your label's text automatically:
|
Repeat the steps 2 through 5 for all UI elements in all your menus until everything is marked up.
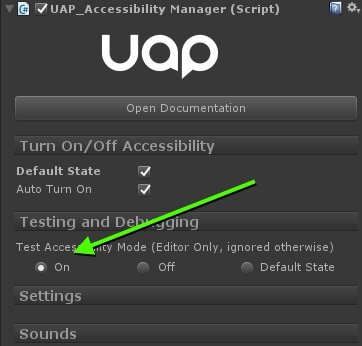
Select the Accessibility Manager in your scene and enable Editor Test Mode in the Testing and Debugging rollout.
You can now jump into game mode and test your accessibility.
|
It is strongly recommended that you read this page on UI Elements next.
Check out the How To Guides to find answers to the most common questions and use cases.
To make your app's accessibility shine, take a look at Best Practices.
To learn more about how the plugin works in detail, go to Plugin Basics.
IMPORTANT
If you are testing on Windows and do not have an actual screen reader installed, the plugin will use Window Speech Synthesis as a fallback for debugging purposes. This system works well, but speech is generated with a very noticeable delay
This delay is caused by Microsoft SAPI and not the plugin. It will not appear on mobile devices or when testing with NVDA under Windows.
Since this can make testing cumbersome, it's recommended that you download NVDA, a free and very popular screen reader.
It can be downloaded here:
NVDA - NonVisual Desktop Access
IMPORTANT
Keyboard navigation on a desktop computer is different from swipe navigation on mobile devices. Use the up and down arrows to navigate.
See Navigation for more details.
IMPORTANT
By default, the accessibility features will be disabled.
The plugin will turn itself on if an accessibility service (such as TalkBack or VoiceOver) is detected.
Alternatively, the user of the app can enable them either through a magic gesture, or through a menu (if you offer one).
 1.8.11